Getting started with API
Step-by-step walkthrough on how to obtain the API tokens for performing various operations with Last9
Overview
The API provides a programmatic method to access and operate Last9. This exposes a subset of features and actions that can be performed on Last9 as REST APIs. For example, you can send change events to Last9 using these APIs or you can generate alert rules.
These APIs differ from the instrumentation and configurations required for data ingestion into Last9 clusters. They also differ from querying APIs provided by Last9 to read data from a Last9 cluster.
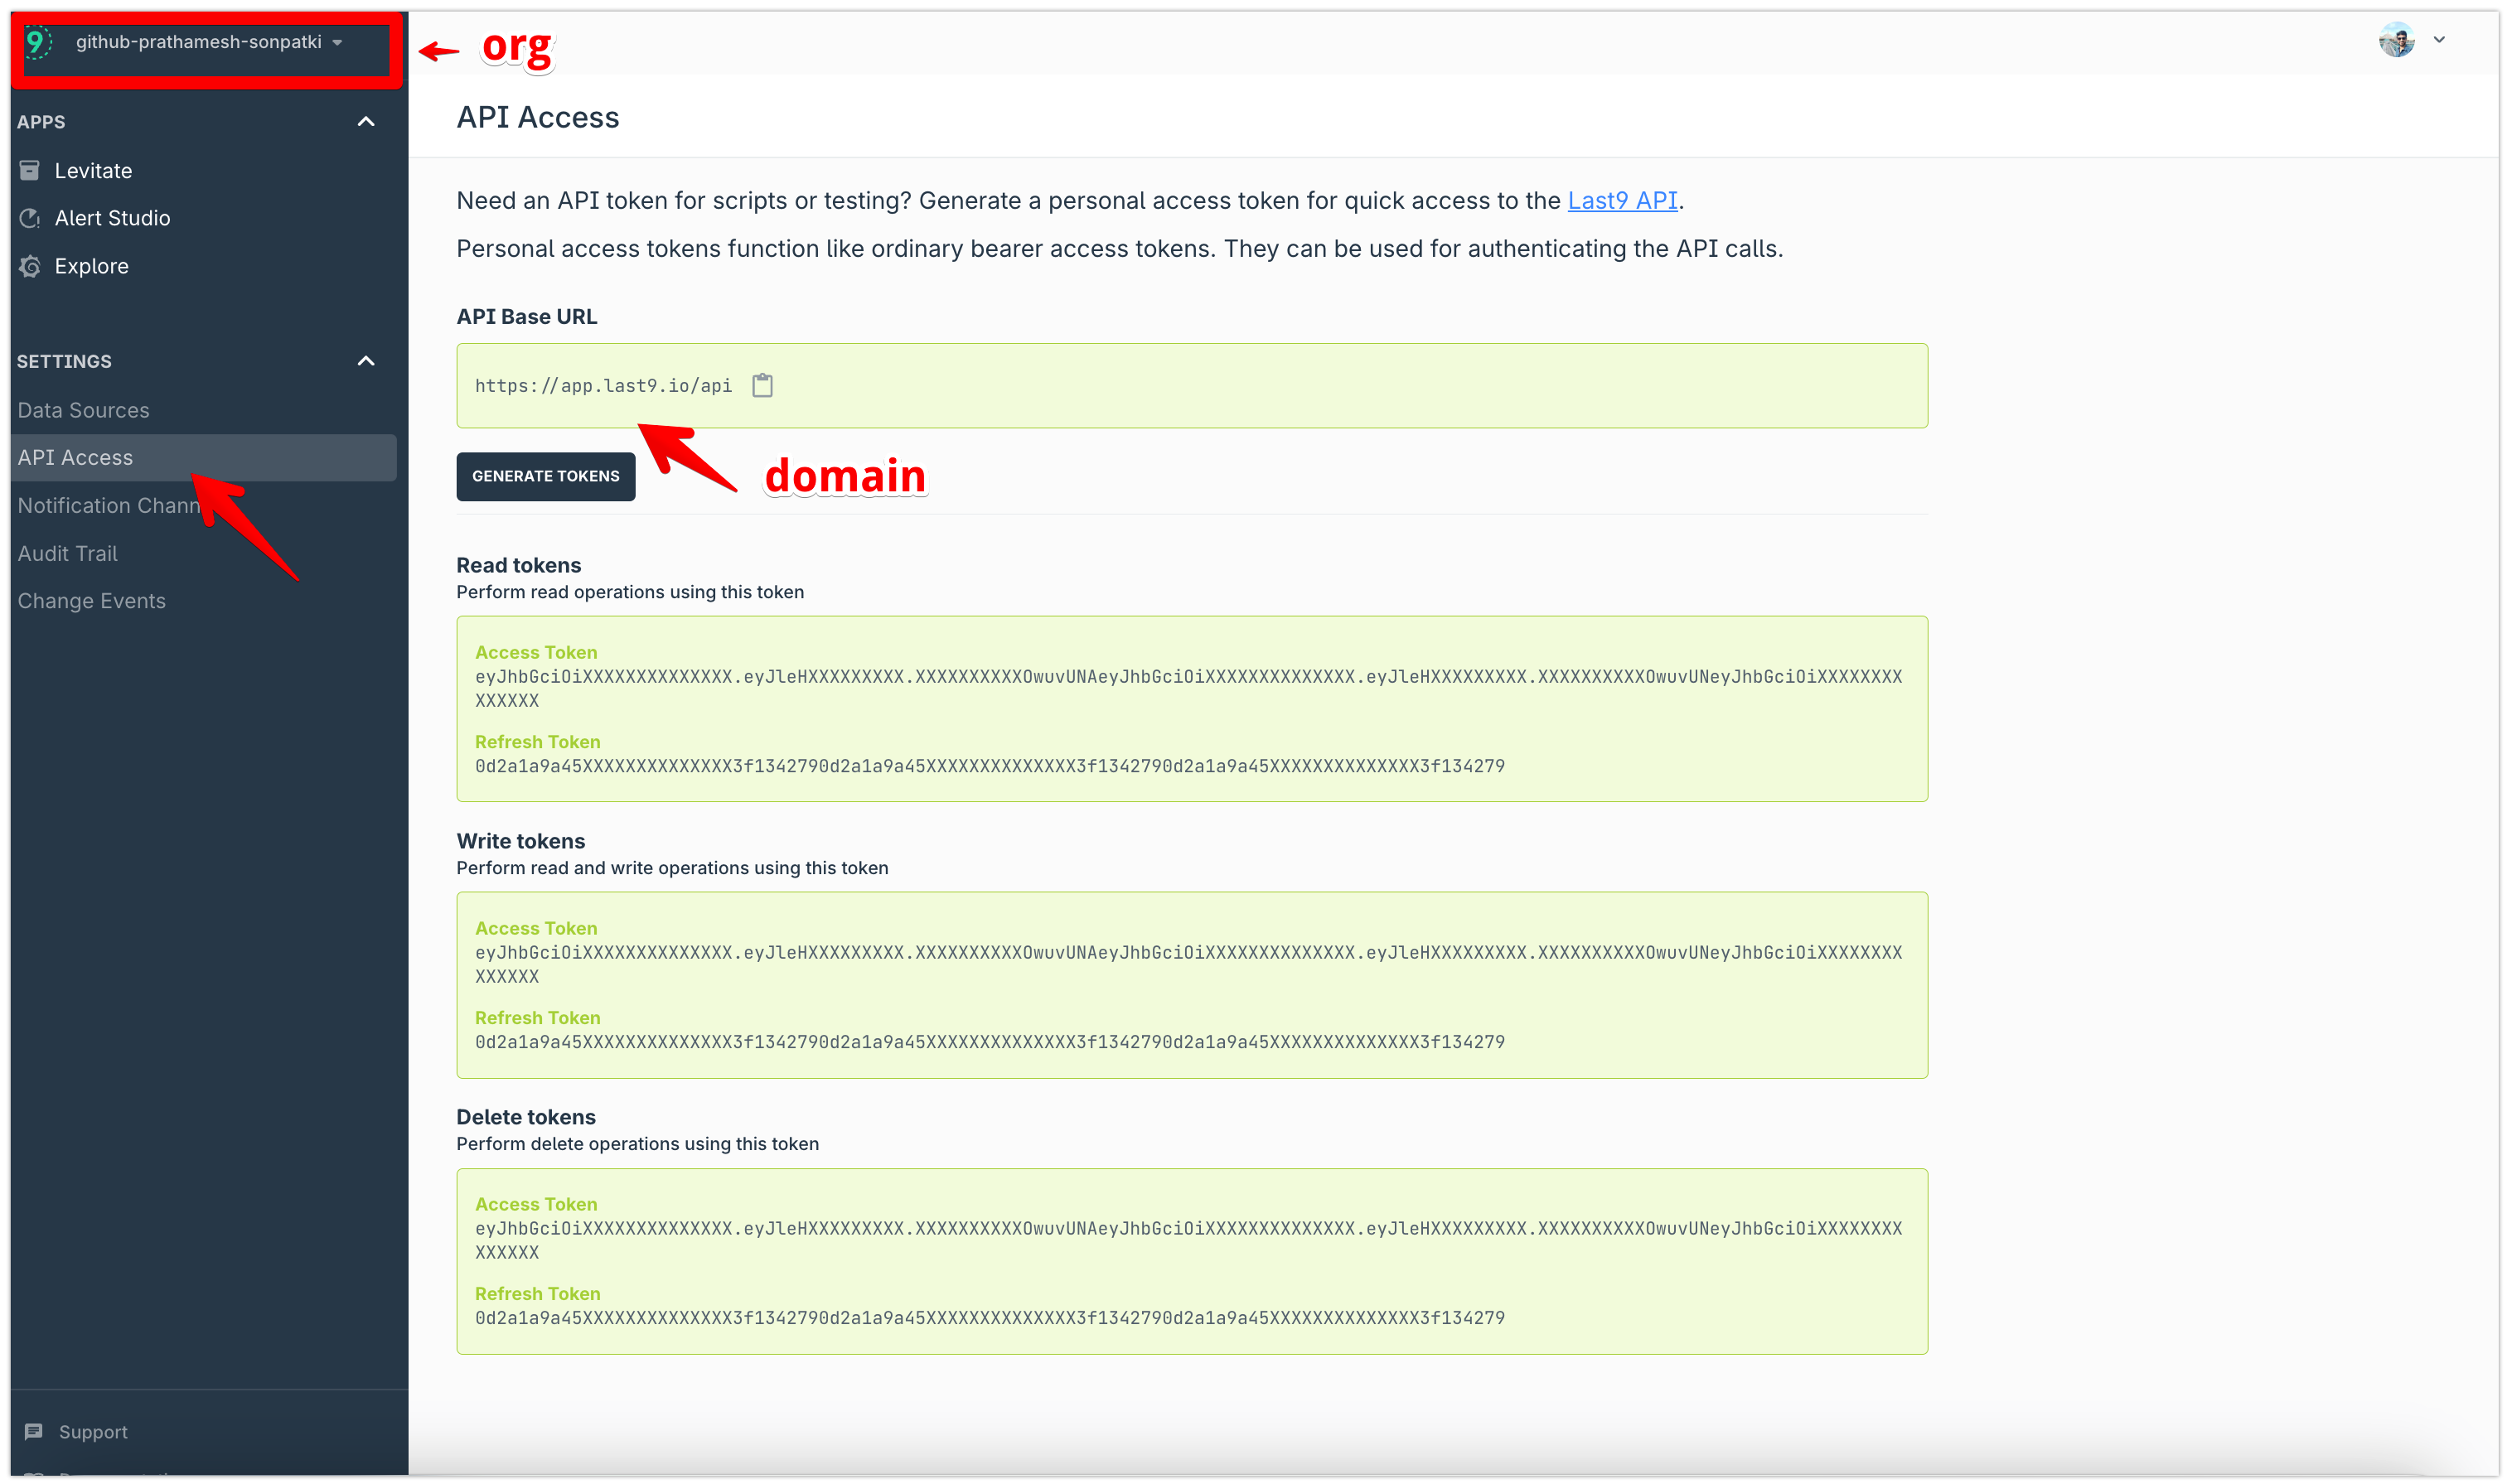
Base URL
The base API URL can be obtained from the API Access page. It is in the following format:
https://{domain}/api/{version}/organizations/{org}/{endpoint}
The {org} parameter is your unique organization slug.
Tokens
The Authentication is performed using Bearer access tokens. Tokens are generated for a logged-in user. Click “Generate Tokens” to create the tokens. A total of 3 pairs of tokens for access and refresh are generated with authentication-specific claims for read, write, and delete operations.
Token Expiry
The Tokens expire in 24 hours; the user or application that uses these tokens should account for expirations and incorporate a refresh mechanism using the refresh token issued along with the access token.
The following error will be raised when the access token expires.
{ "error": "Authorization token is expired" }
In such scenarios, you can generate a new access token using the refresh token as follows.
POST /v4/oauth/access_token
Request Body:
{
  "refresh_token": "eyJhbGciOiXXXXXXXXXXXXX.eyJleHXXXXXXXXX.XXXXXXXXXOwuvUNA"
}
The response of this endpoint will contain a pair of access tokens and refresh tokens if the refresh token in the request body is valid.
Response
{
  "access_token": "eyJhbGciOiXXXXXXXXXXXXXX.eyJleHXXXXXXXXX.XXXXXXXXXOwuvUNA",
  "expires_at": 1587412870,
  "issued_at": 1587240070,
  "refresh_token": "eyJhbGciOiXXXXXXXXXXXXX.eyJleHXXXXXXXXX.XXXXXXXXXOwuvUNA",
  "type": "Bearer",
  "scopes": ["read", "write", "delete"]
}
Usage
The tokens are specifically separated based on the scopes they are authorized to perform based on the impact they might have on the system's overall behavior.
- Read Tokens: Have a minimum impact on the performance of the Last9 application. These are to be specifically used for reading the current state of the data
- Write Tokens: Use this token to create or modify data in any supported entity. This could change the behavior of your usage of Last9
- Delete Tokens: Use this token judiciously. This could break the processes and cause an irrevocable state through missing data
Authentication & Authorization
All public API endpoints require a Token to be supplied as an authorization header for all requests. The token is used to identify the user/application and authenticate the requests to API. The header name must be X-LAST9-API-TOKEN.
Making your first API request
Please follow the steps below to create our first API request for a change event.
Step 1: Generate Tokens
Refer to the Tokens section above and generate the tokens from the API Access page. For your first request, copy the Write Access token.
Step 2: Base URL
The base URL of your instance can be obtained as specified in the Base URL section above.
Step 3: Making the API request
The endpoint for creating change events is
PUT /change_events
{
  "timestamp": "2024-01-15T17:57:22+05:30",
  "event_name": "new_deployment",
  "event_state": "start",
  "attributes": {
    "env": "production",
    "k8s_cluster": "prod-us-east-1",
    "app": "backend-api"
  }
}
The cURL request looks as follows:
curl --location --request PUT 'https://app.last9.io/api/v4/organizations/github-prathamesh-sonpatki/change_events' \
--header 'X-LAST9-API-TOKEN: Bearer <WRITE_ACCESS_TOKEN>' \
--header 'Content-Type: application/json' \
--data '{
  "timestamp": "2024-01-15T17:57:22+05:30",
  "event_name": "new_deployment",
  "event_state": "start",
  "attributes": {
    "env": "production",
    "k8s_cluster": "prod-us-east-1",
    "app": "backend-api"
  }
}'
Step 4: Verify the response
The API will return the following response in case of success with HTTP status code 200.
{
  "message": "success"
}
Troubleshooting
Please get in touch with us on Discord or Email if you have any questions.